No matter what project you decide to print, there is always a chance that something will go wrong. While technology is improving the success rate of print jobs, there is still a lot of user knowledge required. Please look through the categories below for some tips on how to make your printing operation more successful.
Rafts
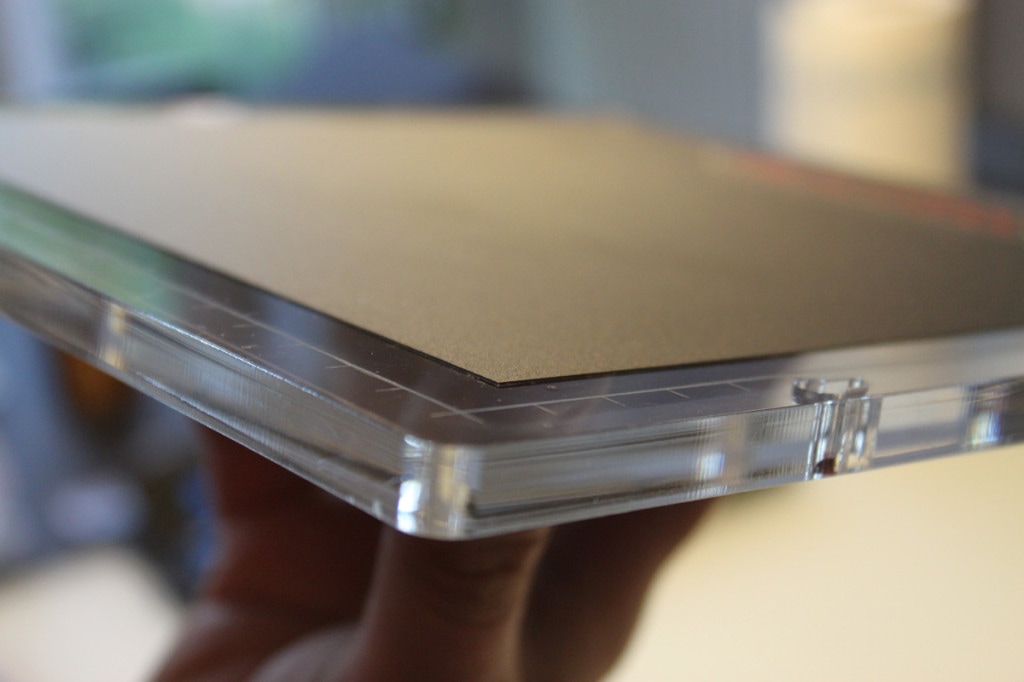
In 3D printing, rafts are a necessary addition to most projects. This is especially true for objects that have very little contact to the baseplate or top heavy objects. Like the name indicates, a raft is a small amount of 3D printed material that goes between the baseplate and the start of your project. Rafts have many benefits, the most notable of which are:
- They provide a surface that your first print layer can stick to. Often, if you try to print directly to the base plate the printing fails to stick and you end up with a ball of plastic on the extruder nozzle.
- It protects your print job while peeling it off of the baseplate. If you did manage to print your project directly to the baseplate, it runs a high risk of being damaged as you use tools to pry it free.
|

|
Supports
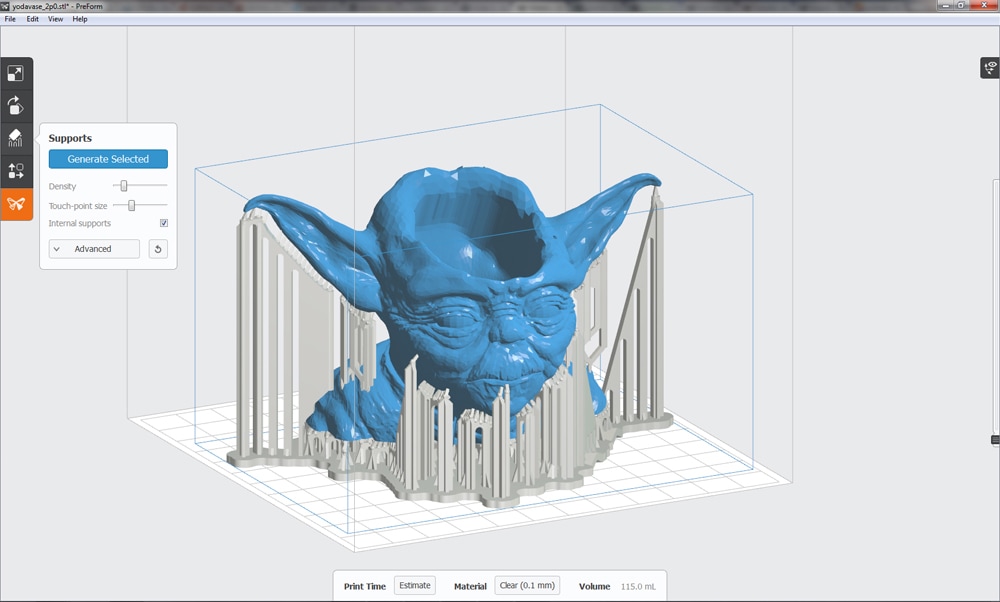
Supports are the 3D printing equivalent of scaffolding. When selected, supports are added automatically to 3D print jobs by the slicer. They prevent a whole host of design problems from becoming print problems. For example, If you were to 3D print an airplane as one piece, the wings would not print as intended. This is because you cannot print on air; overhanging parts will be printed as a droopy mess due to the lack of supporting material beneath them. Supports provide the necessary material to print hanging parts in your project.
The main drawback of supports is that they are at times difficult to fully remove from your project and might need to be sanded or scraped off. In some cases, the supports generated by the slicer will be insufficient and will fail during the print. As a result, you will need to manually generate supports in the slicer.
The main drawback of supports is that they are at times difficult to fully remove from your project and might need to be sanded or scraped off. In some cases, the supports generated by the slicer will be insufficient and will fail during the print. As a result, you will need to manually generate supports in the slicer.
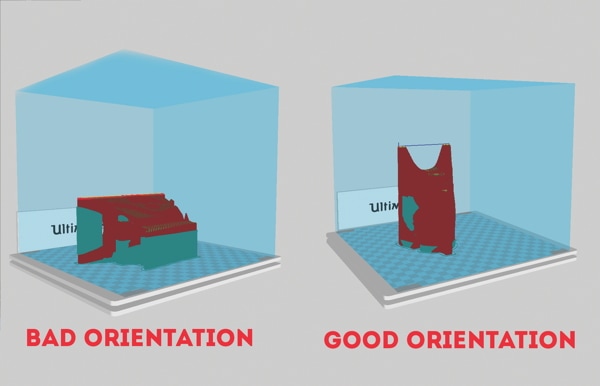
Orientation / Dripping
Dripping occurs when a print layer is not adequately supported underneath; this is most common when printing hollow objects. As the printing progress, the lack of support creates gaps or holes in the object. The closest comparison would be trying to use a hot glue gun across a large gap; the glue gets stringy and only takes hold when it hits a surface.
There are three main ways to avoid dripping:
Remember, 3D printing involves a lot of trial and error. In addition, materials like PLA and ABS can be sanded, glued, and painted with common art supplies (i.e. files, crazy glue, acrylic paint, etc.).
There are three main ways to avoid dripping:
- Change the orientation - A simple rotation of 90 degrees can make a substantial difference in the quality of print as it may reduce the length of unsupported area.
- Print in parts - It can often be easier to print your project as separate parts and glue the parts afterward.
- Turn on supports - Supports will fill the project sufficiently and prevent dripping. This option may not be possible if your project is intentionally hollow; getting the supports out would be impossible unless you are Houdini.
Remember, 3D printing involves a lot of trial and error. In addition, materials like PLA and ABS can be sanded, glued, and painted with common art supplies (i.e. files, crazy glue, acrylic paint, etc.).

|
|
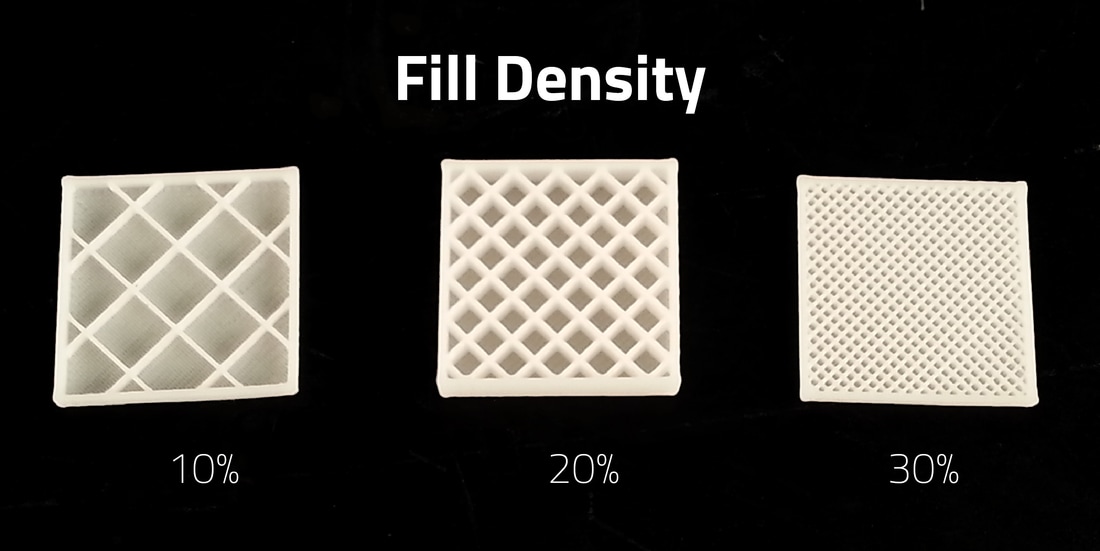
Fill Density
Fill density is a setting found in the slicer that specifies the amount of material used to fill solid sections of your print job. Different densities are useful for different types of projects. For instance, a project that needs to withstand physical stress will need a higher fill density. A standard density setting for most print jobs is usually between 10-30% (lite); this provides an acceptable amount of rigidity while conserving on filament usage. Densities over 30% (medium to solid) should only be used for special jobs as the economics would surely weigh on school budgets.
Baseplate Options
Baseplates (beds) can be made of many different substances; regardless, the most common problem you may encounter is a difficulty in adhesion of the object to the baseplate which either causes the object to curl at the edges or even worse, fail completely. Here are a couple options that may help if you are experiencing poor adhesion:
- Removable base layer: 3D printer manufacturers and/or 3rd party companies may sell custom size printable covers that adhere to the baseplate.
- Heated baseplate: Some 3D printers have built-in heated beds that aid in adhesion. Be sure to read the manual of your printer to see if the temperature of your baseplate is set properly for your filament material.
- Adhesion aids: In some cases, items like painter's tape and glue sticks can be used to increase adhesion. Be careful with some of these materials as they may be difficult to remove from the base afterwards.
- Speed: Lowering your print speed for the initial layers can help to improve bed adhesion.